Using the Classic Grid UI
RouteMaster VR has two alternative control interfaces for making routes: "Classic Grid" and "Arm and Take". This page describes how to use the "Classic Grid" UI. You can switch between using the Settings/Control Interface menu.
Making Routes
The "Classic Grid" interface shows you the current state of routing., and allows you to easily change routes.
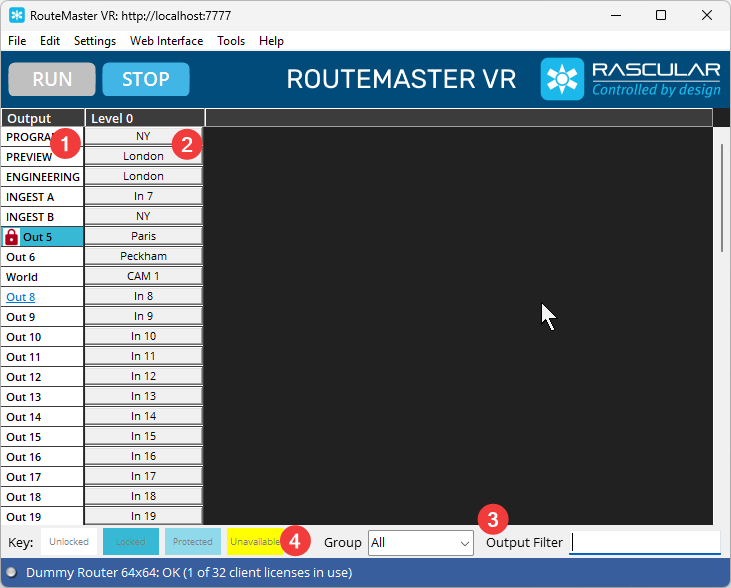
- The left-hand column of the grid shows the router outputs in numerical order. Locked outputs will have a padlock icon shown.
- There's a column shown for each level of the router, showing the name of the input currently routed on each level. Click on these to change the route.
- You can easily find a specific output using the
Output Filterbox. If you've define Output Groups, theGroupselector allows you to show only outputs in a specific group. - A colour key is shown at the bottom of the grid, to help you understand the state of each output. Locked, protected and unavailable outputs are shown in different colours.
When you've located the output you want to change, click on the cell for the level you want to change. A dialog appears allowing you to select the new input for that level.
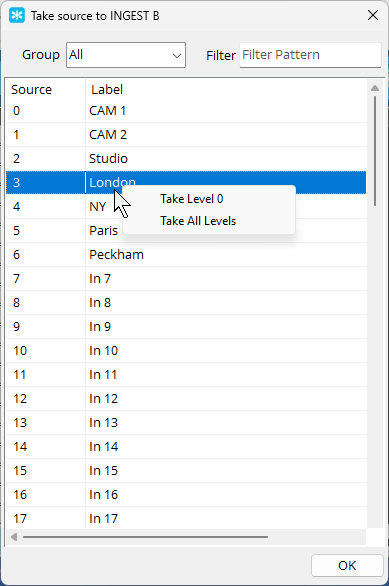
Filtering and Group selection can be used here to locate the required input. For a single level router, clcicking on the input will immediately make the route. For routers with multiple levels, a popup menu lets you choose to route the source to just the selected level, or to all levels.
You can switch the chosen output between inputs continually without leaving this dialog.
Locking and Unlocking outputs
To lock, potect or unlock an output, right-click on the output's cell, and select the operation from the drop-down menu. The padlock icon and colour will change to reflect the new state.

The behaviour of lock and protect varies between routers. RouteMaster VR uses the router's native lock and protect mechanisms, which will depend on the router being controlled.
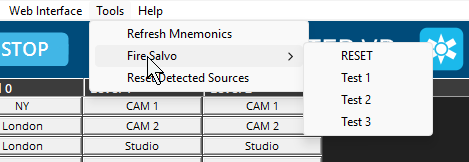
Firing Salvos
If the router supports salvos - or if salvos have been configured in RouteMaster VR - you can fire a salvo directly from the UI.
Select Tools/Fire Salvo from the application menu. A sub-menu showing all the available salvos will appear. Selecting one will instantly fire the salvo.