Router Mapping
RouteMaster VR lets you alter the relationship between the physical crosspoints on your router and the virtual crosspoints managed by RouteMaster VR. What do we mean by this?
Let's say we have a 64x64 router, but we want to only allow control of sources 10-17 and destinations 32-47. We use mapping to redefine the router size as 8x16, and add offsets of 10 to the source and 32 to the destination.
Now if a control panel requests to route Source 5 to Destination 2, we actually route source 15 to destination 34.
Mapping Configuration in the Application UI
To configure mapping, open the Configure Routers dialog, select the router and choose the Mapping tab.
Using the Mapping tab, select Enable Mapping (1). Then you can set offsets for source, destination and level (2), and change the mapped size of the router (3). These features are particularly useful with Stack Routers where several physical routers are controlled together.
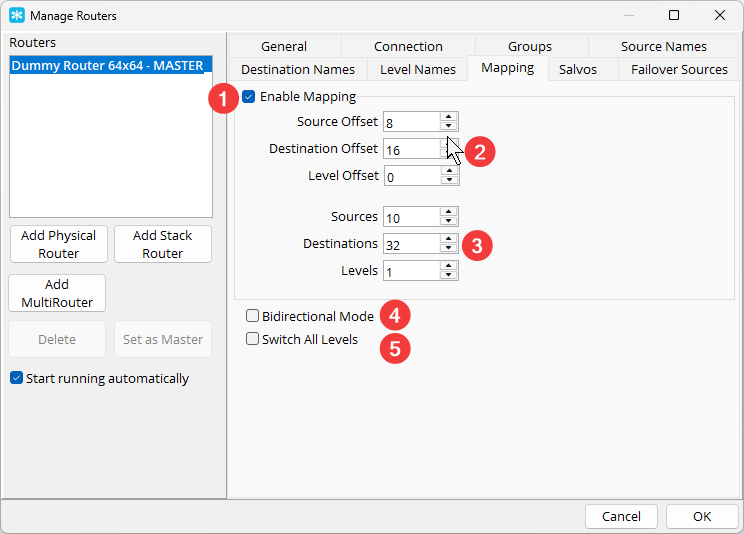
Bidirectional Mode (4)
This is a mode required for certain specialized router configurations. When this mode is enabled, routing Source X to Destination Y causes a corresponding route from Source Y to Destination X to be made.
Switch All Levels (5)
This option causes all levels of the router to be switched, regardless of which levels have been requested by the controlling client. This is useful when controlclients don't support levels, or when you want to ensure that all levels are switched together.